#SciFund Challenge Class
Part 11: Sending it to Print
Your poster is now just about complete. So let’s go through some final checks to make sure that everything is in order:
- Remove any residual placeholders (dummy text, blank figures, etc).
- Proof read for spelling and grammar.
- Double check all your column, image, and text alignment.
- Does your poster need a bleed? Do this if you have graphics that go all the way to the edge of your poster.
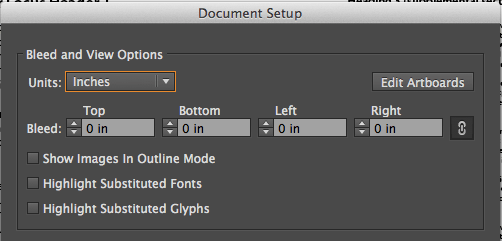
- Illustrator: If you followed our initial tutorial, we established our poster with a bleed. You can still add one now if you didn’t. Just navigate to File > Document Setup and a pop-up (like the one below) will appear. From there add your bleed (you shouldn’t need anything more than 1.25 cm) on each side.
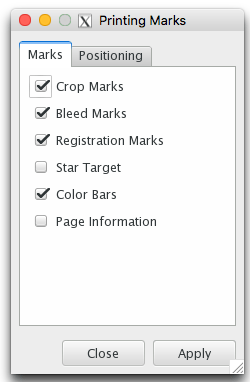
- Inkscape: Click Extensions > Render > Layout > Printing Marks. In the pop-up menu make sure Crop Marks and Bleed Marks are checked, and then click the Positioning Tab. Here set your Crop Marks to the page size, and make sure your bleed has a margin of at least 1 cm outside your page, by adjusting the Bleed Margin. Click Apply, and you will see some printing marks all around your poster. Your printer professional should know how to interpret these marks.
- Are your poster margins wide enough? That is, is there enough space between your poster content and where your poster will be cut? This is called your Safe Area. Printers will want at least 1.25 cm of space to properly trim your poster. You’ll want to make it larger (consider at least 2.5 cm) so it looks nice and clean. By now your poster is looking gorgeous, and if you’ve been following our advice, you’ll have much more space around the edge than this.
- Are your colors in the CMYK color space? Double check by:
- Illustrator: navigate to File > Document Color Mode and making sure CMYK is checked.
- Inkscape: navigate to File > Document Properties and under color add Generic CMYK Profile.
- Are your fonts large enough to read at a distance? Remember you should make sure the letters in your title are at least 2.5 cm in height. Your body font should be easily readable from a few feet away. To test this, print your poster on a single sheet of 8.5 x 11 in paper and read it at arm’s length. If you can read everything, your poster will read just fine.
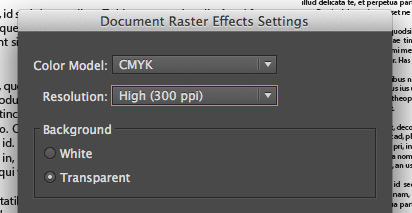
- Make sure your poster resolution is set at 300 DPI. This goes the same for raster images in your poster. To do this:
- Illustrator: navigate to Effect > Document Raster Effects Settings and make sure your document is set at 300 dpi.
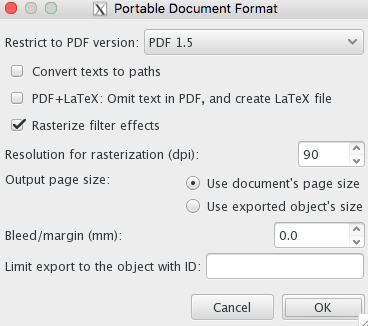
- Inkscape: You can do this when you save your poster for print. Navigate to File > Save As and select PDF from the Dialog window. Set your Resolution for Rasterization to 300 dpi.
- Convert your text to vector objects. You will not be able to edit your text anymore so save this for last! We do this because your printer may not have the fonts you have used. If they need to make edits to your file, the fonts will be converted to what the computer thinks is a close match. To convert your text:
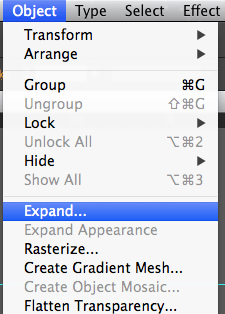
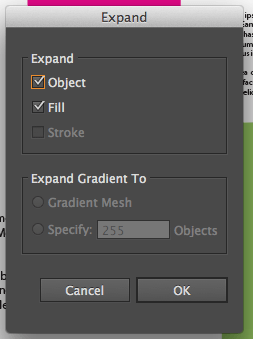
- Illustrator: Highlight all of you text and navigate to Object > Expand. In the pop-up window only select object and Fill as shown below.
- Inkscape: Again this can be done from the Save PDF Options (as shown in the previous step). Just click the “Convert texts to paths option.” Additionally, you can highlight all text in your poster, then navigate to Path > Object to Path.
Keep your guides as a separate layer and label it “Guides.” We haven’t talked much about layers. You’ll want to make your guides as a separate layer so the printer can easily distinguish your design from the guides (the guides shouldn’t print anyway, but this is good practice).
- In Illustrator: To create a separate guides layer and place your guides in that layer:
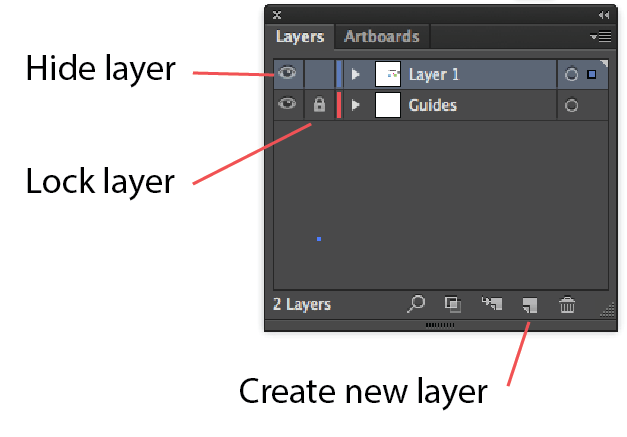
- Open the Layers Panel by navigating to Window > Layers.
- Using the image below as a guide, select the “Create new layer” button. A new layer named Layer 2 should be created. You can change the name, by double clicking where it says “Layer 2.”
- Now select all of your guides on your artboard and press Control+X (Windows) or Command+X (Mac) to cut the guides.
- In the Layers Panel select your Guide layer by clicking the circle to the right of the layer.
- Now simply press Control+F (Windows) or Command+F (Mac) to paste your guides exactly where they were previously, and in your guide layer.
- If you wish to know more about layers, this video will go into greater detail.
- In Inkscape: We’ve talked more about layers in Illustrator than for the Inkscape peeps, but here is a bit more for you:
- Open the Layers Panel by navigating to Layer > Layers.
- Create a new layer by clicking the “+” icon. You can change the layer name by double clicking the layer name from the list.
- You can move items from one layer to another by right clicking the object and selecting “Move to layer…” and then selecting the layer you’d like this object to be in.
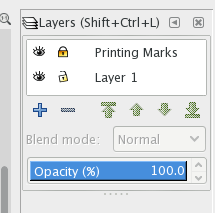
- Lock your design in the layers panel. As shown in the images above, you can lock a layer in place. This means that you can’t move or edit that layer, without first unlocking the layer. To lock/unlock a layer, just click the layer lock icon just left of the layer name.
- Save a copy of your poster as a PDF.
- Send to the printer.
- Ask for a proof. The printer will send you a digital proof of your poster as it would appear once it is printed. Look over everything carefully, one last time!
- Give the printer the go-ahead, hold your breath, and cover your eyes!
- Self high five.
We’ve also created an abbreviated form of this checklist for you to reference, print, and keep handy for future posters and print job.
With your poster complete, it is time to send your poster to print. Hopefully, you have one picked out. If not, many universities have a print shop that specializes in these types of prints. Fedex Office, Staples, and Office Depot (or OfficeMax) should also have printers that can handle academic poster sizes. The added benefits of these printers is that you can send the poster electronically to a location (say your conference is out of town) and not have to worry about transporting the poster to the conference on the plane.
If you have any questions about your design, or the print process, speak with your printer. They are generally very knowledgeable and should be able to point out any issues with your design. Having this dialogue is crucial to avoid making any costly assumptions on both your part and the printers. And having a basic knowledge of what the printer needs to know will make the process run smoother for you in the future.
Remember, once the poster is printed there is no going back.