Welcome to Week One of the SciFund Challenge 2015 poster design course! With this class, we have two goals. One: to build a compelling and eye-catching poster. Two: to help our classmates to build their poster making abilities. So let’s get started with both!
At the center of every good poster is a compelling story and a clean, organized layout. Throughout the course we’ll help you to develop the eye for layout. However, the primary focus this week is on crafting the message that will be at the heart of your poster and that will drive your layout.
This week has a five part structure:
Part 1: Get started with the class and become familiar with the Google+.
Part 2: Understand the role your poster plays in your conference experience
Part 3: Begin to immerse yourself in the Adobe Illustrator or Inkscape environment.
Part 4: Assignments.
Getting Started with Google+
1. Don’t panic! There are a lot of steps here, but many of them are very quick. There are a few technology things that we want to introduce you to this week and, since some of us are technologically less inclined, we want to lay out these things out very precisely. Hence the long (but hopefully quick to follow) instructions.
2. The class infrastructure largely exists on the Google+ social network, particularly the Google+ community page for the class. So, if you can’t access the community page, you won’t be able to participate. If you are having trouble joining the class’ community page on Google+, contact me (jai@scifund.org) or Anthony Salvagno (anthony@scifund.org) immediately.
3. Can’t figure something out or having trouble with something? Send one of us a note and let’s talk about it. We’re very happy to help with any issues you may be experiencing. There is one issue in particular that we especially want to hear about. This class is intended to facilitate interactions between participants. Although we certainly hope all of the interactions are positive, if you are having a problem with any other person in the class (instructors included), we want to know about it immediately.
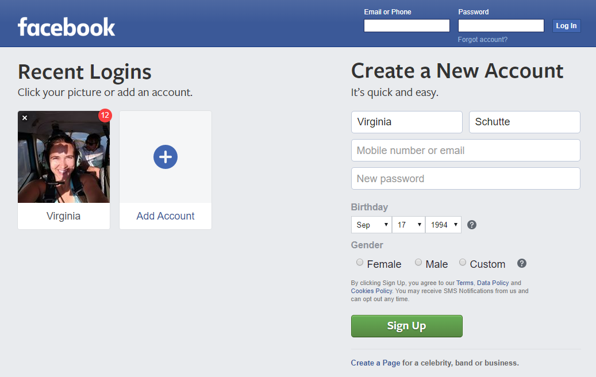
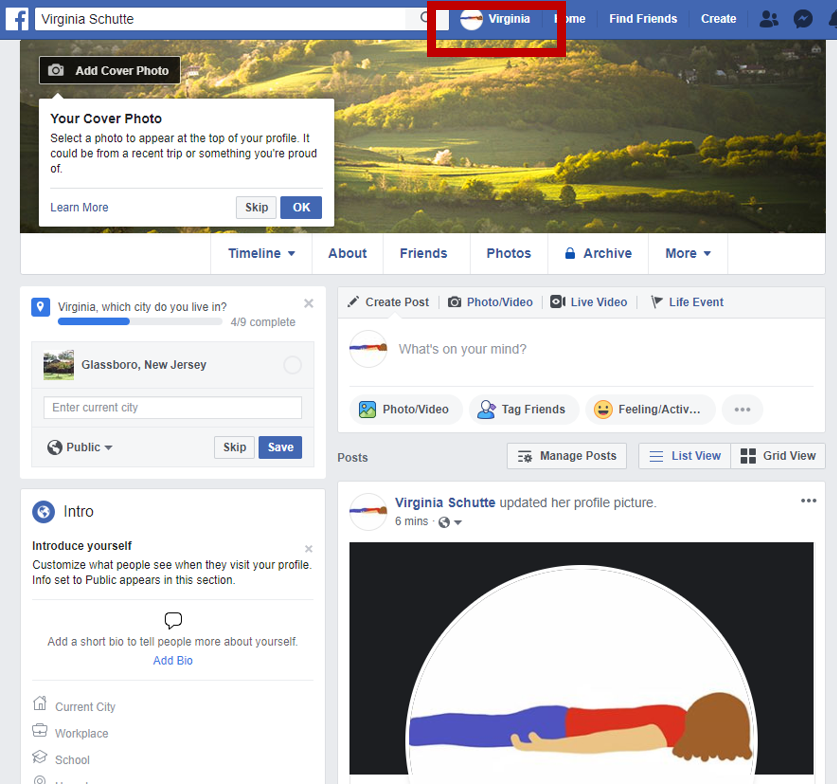
4. Google+. So, how does the SciFund Challenge poster class community page work anyway? Watch this short screencast, by Jai, for a short introduction (note, the video specifically references our 2016 Video Class, but the functionality is all the same):
5. Discussion groups (part 1). Every week, we’ll be breaking out into one-hour discussion groups courtesy of Google Hangouts. We have scheduled several one-hour discussion sections for every week. Sign up for ONE of them, please (see the video from the previous step, for instructions how to do this). All sections will be facilitated by one of the course instructors and all the sections will cover the same topic. Sign up now for one of the sections on the Google+ community page for the class (see the Events category of the community page). VERY IMPORTANT: Only ten people are allowed in a single hangout (1 instructor, plus nine participants). If you see ten people already signed up for a hangout, that hangout is full.
6. Discussion groups (part 2). The way the discussion groups will work is as follows. A minute or two before your scheduled discussion section is supposed to start, sign in to your Google+ account. At the appointed time, you’ll receive an invite to the Google Hangout. You’ll also receive an invite via gmail (check the Social tab). You can also enter the Hangout by going to its page on the class’ Google+ community (see the video from step 4 for an illustration). During the Hangout, be sure to have your sound going through headphones! If you don’t, it is almost certain that someone’s speakers and microphone will cause enough feedback to kill the audio feed for everyone. If you are having specific problems with Hangouts, Google has a troubleshooting page on the very topic.
7. Discussion groups (part 3). Some participants may find themselves following behind in the class, as the weeks go on. Even if you are behind, you still should come to the hangouts. You will still really benefit and we definitely want to see you.
The Purpose of the Academic Poster
The build up to a conference can be a stressful time. With all the prep work that goes into getting there it can be easy to forget to prioritize. The number one reason we attend conferences is to network with our colleagues and peers. That’s not to say there aren’t other motivations to attend, but we all go with the intent to engage others in science and the poster presentation gives us the momentary spotlight.
So how does your poster help you network?
Overall, the poster can be thought of as your conference resume. The purpose of a resume is to get you noticed, most likely for an interview, and the poster has a similar roles. The purpose of your poster is not to pack in every last detail about your research. Your poster’s purpose is to grab the attention of other conference-goers, so that they want to know more about your research.
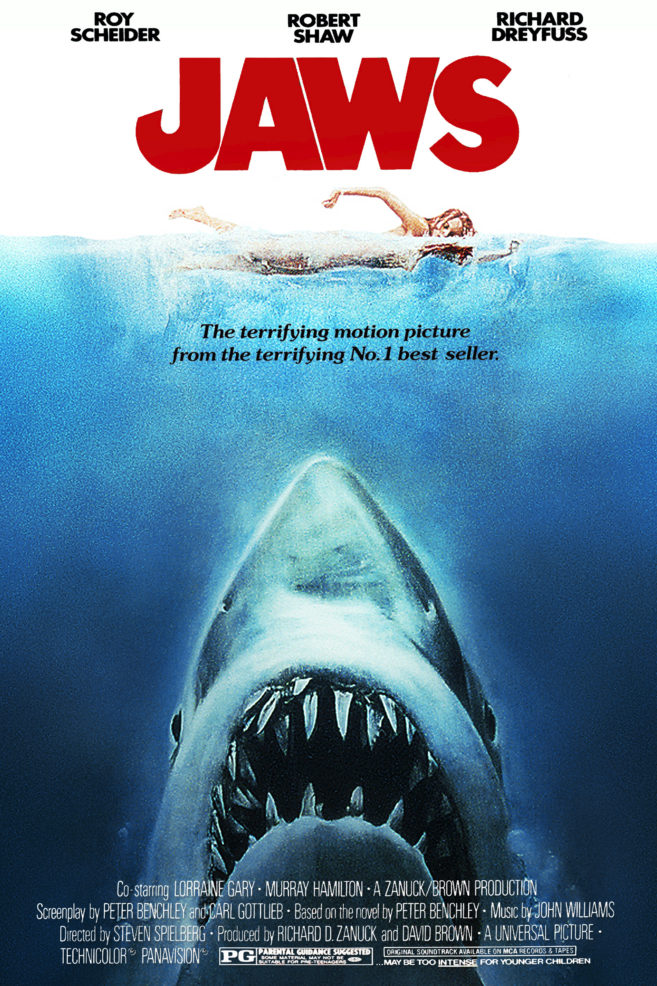
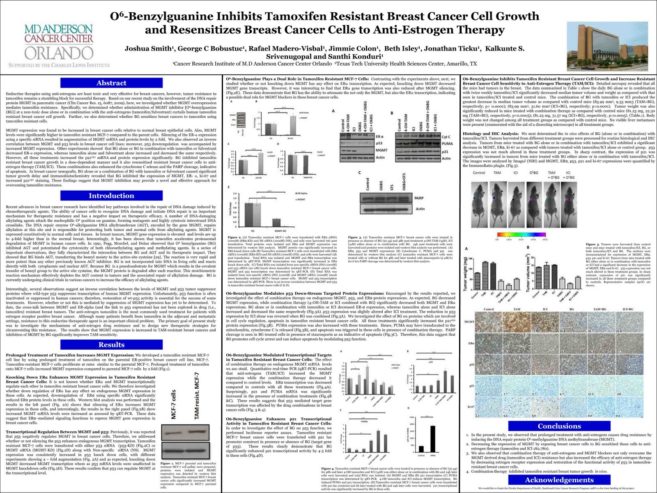
How do you get attention? Not with an overwhelming amount of detail. Conferences are busy places, and there are always more posters to see and people to meet than there is time available. A poster that is as dense as a scientific paper will be ignored because of this time consideration. For example, it’s unlikely that this poster would convince any casual passersby to stop, because it contains about as much text as a full scientific paper:
Just to emphasize here: a poster is not a paper. A paper is intended to convey the maximum information in the minimum amount of space, and reading a paper is typically a solitary experience for the reader. A poster is, at its best, a social experience. Posters are conversation starters.
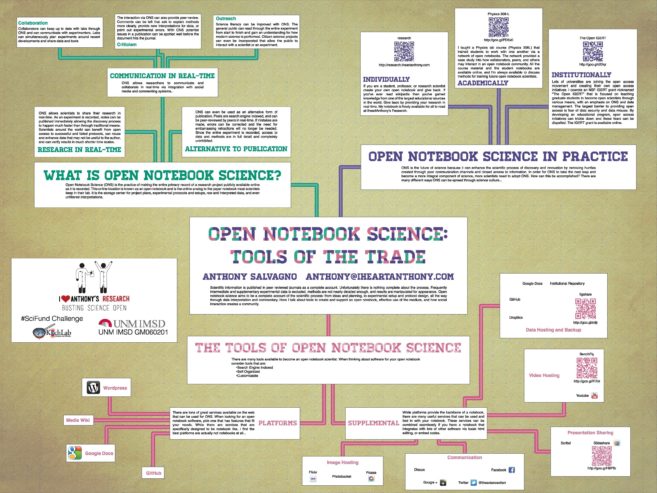
The right way to get attention with your poster is to clearly structure it around the one to few big picture ideas (preferrably one) that you want people to remember and that will get conversations started. Admittedly, there will be a portion of poster time when you are not standing at your poster. With this in mind, content wise, your poster should contain a complete story (without being overwhelming in detail). Take a look at the following poster, which provides an introduction to open science for scientists. The poster focuses on big picture ideas, with web links (and associated QR codes) provided in the poster, if readers want further information.
Remember this is your conference resume and it should contain enough information to entice your audience, but also give them a full view of your research.
The real fun begins when you are standing at your poster ready to deliver your content. In this setting, the poster serves as a conversation piece, basically the device to engage your audience. Your poster will contain keys (think data and figures) that you can use to highlight your message, but after a few of minutes your audience will be engaging mostly with you.
A great poster will get you to the conversation you want to have. It will not be the crutch you lean on to get you through it. Before you can have a great poster, you need to be a good communicator.
So let’s work on our communication!
Using Conferences to Advance Your Career
Before you start laying out your poster, it is essential to figure out how you want to use it to advance your scientific career. There are a three questions that you should consider in order to help focus your thinking. The answers to these questions will drive the content and layout of your poster.
First, what are the career goals you might have for a conference? Though there are many potential objectives, your goals most likely fall into the following categories:
- To improve your chances of getting into your desired graduate school programs by connecting with potential advisors.
- To improve your chances of getting a job by connecting with potential employers.
- To increase uptake in your field of a new method that you have created or improved upon.
- To increase the citation rate of your research papers and to improve the visibility of your research generally in your field.
- To find new collaborators.
Second, once you have identified your primary goals, the next question is: who precisely should you connect with at a conference to achieve those goals? The answer is most likely a very narrow set of people (most likely in your field) or perhaps even one person. Identifying the exact person or people who can help advance your career isn’t always easy and isn’t necessarily the first person/people that come to mind. It can be very helpful to talk through this question with others and we’ll be doing that in this class, via our Google+ community and group Google Hangouts.
Last, what is the one-point message that you want your target audience to remember? Conferences are busy places and there always is an overload of information and events. As a consequence, you’ll want to keep your primary message very focused in order to increase the chances that it cuts through the clutter and actually registers with your key people. You can present a wealth of information and subpoints that support your main message, but that main message needs to stand up and stand out even if all of the details are forgotten.
Getting Started with Adobe Illustrator
It is time to dive into Adobe Illustrator. At first glance it can be an intimidating and overly complicated piece of software, but in time your comfort level will grow and you will understand its power.
Illustrator is a vector graphics editor, which means that graphics created in Illustrator will scale with no loss in resolution. It is great for poster design because you will have an unprecedented level of control over your document. There are several versions of Illustrator, all of which still work well. Most of our instruction will come from version CS6, which is what Anthony Salvagno, our resident designer, uses. Note that while there are changes between versions, many of the core functions and layout have remained the same.
Over the coming weeks, we will teach you some key features of Illustrator and provide you with a lot of resources that will develop your skill. For now, please perform the following steps.
- Set up your poster document.
- Draw a rectangle
- Draw a circle
- Type some text
- Set up a grid
- Align text to the center of the circle
- Align the left edge of the rectangle to the text.
In order to perform these tasks, we’ve prepared a video tutorial to walk you through each of these steps.
Optional Illustrator resources
Here are a few resources that give you more in-depth knowledge, if you want to get a little extra practice this week with Illustrator.
- Illustrator Hotkeys – you will definitely want to get familiar with a few of these, as it will cut down a lot of time you spend looking for functions.
- Basic Tutorials – You can google search Illustrator tutorials for any version of Illustrator out there. Even older tutorials are useful learning tools because basic layout hasn’t changed much since Creative Suite 3 (the name for the entire Adobe design suite). But try to find tutorials that use your version for seamless education. Many tutorials have a design goal in mind (for instance make a vector-based Kermit the Frog), but they are all great ways to learn Illustrator functions and uses.
- Try this tutorial to make a simple icon to learn about basic shape creation.
- Here is a very comprehensive series of tutorials that work you up to a complex design.
- Here is a compilation of tutorials that walk you through several different designs.
Getting Started with Inkscape
It is time to dive into Inkscape. At first glance it can be an intimidating and overly complicated piece of software, but in time your comfort level will grow and you will understand its power.
Inkscape is a vector graphics editor, which means that graphics created in Inkscape will scale with no loss in resolution. It is great for poster design because you will have an unprecedented level of control over your document. Inkscape is available for both Windows and Mac and is open-sourced. The Windows install is straight forward, but if you are using a Mac please note that the install may be a couple of hours and you will also need to install XQuartz.
Over the coming weeks, we will teach you some key features of Inkscape and provide you with a lot of resources that will develop your skill. For now though, we have prepared a simple exercise with some accompanying video tutorials to get you familiar with the Inkscape interface.
Step 1: Create your artboard
Step 2: Create some text
Step 3: Make some simple shapes
Step 4: Align your objects
And you’re done! Keep playing with the Inkscape feature set to make these tasks second nature. If you’d like to go deeper into Inkscape, the Inkscape developers have created a handy tutorial list, which you can read here.
Assignments
A note on constructive feedback
Many of the assignments of the class will include providing feedback to your fellow classmates. It is very important that we all strive to give constructive feedback which is information-specific, focused, and based on observation. Constructive feedback can be positive or negative. In both cases make sure you address what you like or what needs improvement in a very specific and actionable manner. For example “The font you used really makes it easy to read this poster” or even “This statement doesn’t align with the overall message you are trying to convey.”
In online forums, such as the Google+ community page for the class, there is an obvious concern about people being overly harsh with each other in comments. In practice though with previous classes, it turned out that participants were usually reluctant to offer negative comments at all. So long as the comments are constructive, please do offer all thoughts that are on your mind.
A short section of the book Coaching and Mentoring for Dummies gives good guidance for providing constructive feedback which you can find here.
On to this week’s assignments.
- Sign up for and attend one Google+ Hangout that fits your schedule. If none of the Hangouts work for you, please let the instructors know.
- Consider the answers to the following questions and write them down. The answers to each question should be no more than two sentences.
- What is the career goal that we want to achieve at your conference?
- What specific person or people do you need to connect with to achieve that goal?
- What is the focused message that you want your target person(s) to remember?
- One way to think of the last question is to imagine someone in your target audience has walked up to your poster, and asked, “What’s to learn here?” You should be able to provide your message in one or two sentences.
- How does this take away message advance your goal with your audience?
- Post your answers in the Google+ community for the class (be sure to use the Week One discussion category).
- Now provide written feedback for other students.
- Does the target audience seem to be appropriate, given the career goal?
- Does the message seem on target given the audience and goal?
- Follow along with the Illustrator/Inkscape video tutorials and complete the challenges:
- Set up your poster document.
- Draw a rectangle
- Draw a circle
- Type some text
- Set up a grid
- Align text to the center of the circle
- Align the left edge of the rectangle to the text.
- Optional: Try to complete one Illustrator/Inkscape tutorial from the provided resource list.